The Irresistible Allure of Homemade Pralines and Cream Ice Cream
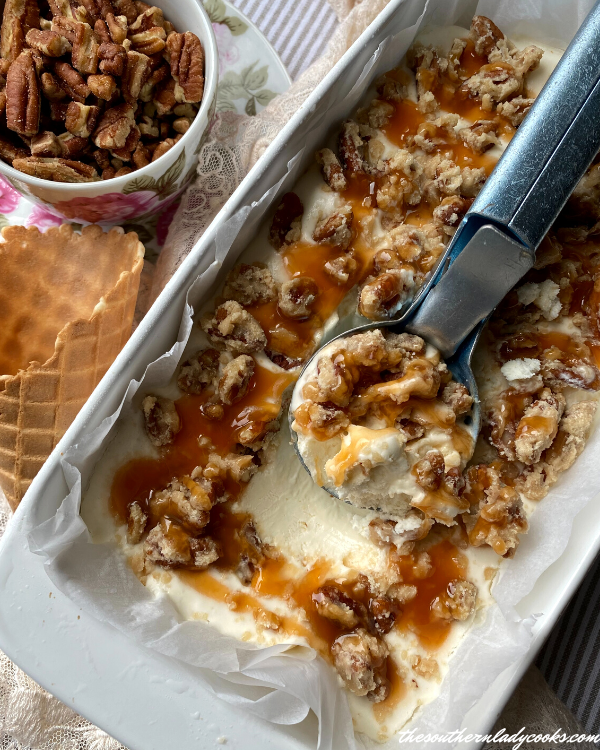
Imagine a scoop of intensely creamy, vanilla-infused ice cream, generously swirled with rich, buttery salted caramel, and studded with crunchy, sweet homemade pecan pralines. This isn't just a dessert; it's a symphony of textures and flavors that tantalizes the taste buds, a perfect harmony of sweet and salty notes. For those who adore this classic treat, the good news is that recreating this magic at home is not only achievable but also incredibly rewarding. Even better, our focus today is on an easy, no-churn, and delightfully gluten-free version of
pralines and cream ice cream that requires no special equipment like an ice cream maker.
Pralines hold a special place in the heart of Southern cuisine, particularly with roots tracing back to the vibrant culinary scene of New Orleans. These delightful confections, often featuring pecans coated in a sugary, creamy candy, evoke a sense of warmth and nostalgia. My own memories are filled with the sweet aroma of Mama's homemade pralines, a staple that always felt like a special treat. Combining these beloved candies with a smooth, cold ice cream base elevates the experience to an entirely new level. While many might be familiar with commercial versions like Baskin Robbins’ Pralines and Cream, there's an undeniable superiority to the homemade rendition – a freshness and depth of flavor that store-bought simply can't match. This article will guide you through crafting your own gluten-free masterpiece, promising a delightful dessert that’s both simple to make and utterly unforgettable.
No-Churn Magic: Simplicity Without Sacrifice
One of the most compelling reasons to fall in love with this recipe for
homemade pralines and cream is its "no-churn" nature. For many home cooks, the idea of making ice cream from scratch might seem daunting, often associated with bulky, expensive ice cream machines. However, the no-churn method completely bypasses this requirement, making gourmet ice cream accessible to everyone. All you truly need are a few basic ingredients, a mixer (handheld or stand mixer works wonders), and a freezer-safe container.
The beauty of no-churn ice cream lies in its simplicity and speed. The actual assembly time for the ice cream base and incorporating the delicious mix-ins is remarkably fast, often taking less than 20 minutes. The longest part of the process is simply waiting for the ice cream to freeze to perfection, which typically requires an overnight chill. This makes it an ideal dessert to prepare a day in advance, ready to impress at your next gathering or satisfy a spontaneous craving. Beyond the convenience, making your own
pralines and cream ice cream offers significant cost savings compared to purchasing premium tubs from the store. You gain full control over the quality of ingredients, ensuring a product free from unnecessary additives and tailored precisely to your taste preferences. Plus, knowing you've created such a luxurious treat from scratch adds an extra layer of satisfaction to every spoonful.
Building Your Gluten-Free Masterpiece: Pralines, Cream, and Caramel
Crafting this exquisite
pralines and cream ice cream involves two primary components: the delightful pecan pralines and the rich, creamy ice cream base, all tied together with luscious caramel. Both elements are naturally gluten-free and, in the case of the ice cream base, also egg-free, making this a versatile treat suitable for various dietary needs.
The Heart of the Treat: Homemade Gluten-Free Pecan Pralines
The pralines are where much of the magic happens, contributing that signature crunch and sweet, nutty flavor. Their preparation requires a bit of attention but is far from complicated.
*
Brown Sugar: We recommend using light brown sugar for a balanced, nuanced flavor. While dark brown sugar can be used, be aware it will impart a stronger molasses note. The key is to achieve that perfect caramelization.
*
Heavy Whipping Cream: This ingredient is non-negotiable. Often called "heavy cream" or "sweet cream," it's essential for the rich, smooth texture of the pralines. Do not substitute with lower-fat alternatives like half-and-half, as the high fat content is crucial for the candy's structure.
*
Salted Butter: The addition of salt is vital as it beautifully brightens and balances the sweetness of the pralines. If you only have unsalted butter, simply add a small pinch of salt to the mixture.
*
Vanilla Extract: High-quality vanilla extract, whether store-bought or homemade, enhances all the other flavors, adding a layer of aromatic warmth.
*
Powdered Sugar: Also known as confectioners' sugar, this ingredient is key for achieving the incredibly smooth and creamy consistency that defines a perfect praline. Granulated sugar will not yield the same silky texture.
*
Pecans, Chopped: These are the star of the praline show. For optimal integration into ice cream, chop your pecans fairly small. This ensures a delightful crunch in every bite without overwhelming the creamy texture of the ice cream with large, bulky nut pieces.
The process involves cooking these ingredients to a specific temperature, then stirring in the pecans and powdered sugar before allowing them to set. The result is perfectly sweet, slightly salty, and wonderfully crunchy praline pieces ready to mingle with your ice cream.
The Dreamy Ice Cream Base: No-Churn Perfection
The no-churn vanilla ice cream base is surprisingly simple, typically relying on just two main ingredients: heavy cream and sweetened condensed milk. While our reference specifically highlights the heavy cream, it's crucial to understand that for a classic no-churn ice cream, sweetened condensed milk provides the sweetness and prevents ice crystal formation, yielding that smooth, scoopable texture without churning.
*
Heavy Cream: This is paramount for the fluffy, creamy texture. Ensure your heavy cream is *extremely cold* when you begin. Cold cream whips up more quickly and holds its volume better, which is essential for trapping air and creating a light, airy base. Do not leave it out on the counter; keep it chilled right up until you're ready to whip.
*
Sweetened Condensed Milk: While not explicitly detailed for the ice cream *ingredients* in the provided context, this is a standard and essential component of nearly all no-churn ice cream recipes. It provides the necessary sweetness and prevents the ice cream from freezing solid, ensuring a deliciously creamy consistency.
The process involves whipping the cold heavy cream to stiff peaks, then gently folding in the sweetened condensed milk and vanilla extract (which brightens the overall flavor). This creates a light, airy, and stable base that will transform into rich, creamy ice cream in your freezer.
The Grand Finale: Assembling and Swirling
Once your pralines are cooled and your ice cream base is ready, the assembly is the fun part. Layer the vanilla ice cream base with generous spoonfuls of your homemade pecan pralines and luxurious drizzles of caramel sauce. You can make your own caramel sauce (ensuring it's gluten-free) or use a high-quality store-bought version. Swirl gently to distribute the flavors and textures, but don't overmix; you want distinct ribbons of caramel and pockets of crunchy pralines. This combination of smooth, crunchy, sweet, and salty elements is what makes
pralines and cream ice cream so utterly addictive.
Expert Tips for Perfect Pralines and Cream Ice Cream Every Time
Achieving ice cream perfection, even with a no-churn method, benefits from a few insider tips:
- Chill Everything: Beyond the heavy cream, chilling your mixing bowl and whisk attachments for 10-15 minutes before whipping the cream can significantly improve its volume and stability.
- Don't Rush the Pralines: When making the pralines, pay close attention to the cooking temperature. Using a candy thermometer ensures accuracy and prevents burning or undercooking, which can affect the final texture. Allow them to cool completely before breaking them into pieces; this helps maintain their crunch in the ice cream.
- Mind Your Pecans: As mentioned, chop pecans fairly small for the pralines to ensure they integrate well into the ice cream without being too chunky. If you prefer larger pieces, feel free, but smaller pieces generally provide a more even texture throughout the dessert.
- The Power of Salt: Don't underestimate the role of salt, both in your pralines and the overall ice cream. A pinch of salt in the ice cream base, or ensuring your caramel sauce has a touch of sea salt, perfectly balances the sweetness and enhances all the other flavors. This salty-sweet dynamic is key to what makes pralines and cream ice cream so delicious.
- Patience is a Virtue: The hardest part of this recipe is waiting for it to freeze. For the best, scoopable texture, allow your ice cream at least 6-8 hours, or ideally overnight, in the freezer. Freezing it in a shallow, wide container can sometimes speed up the process slightly.
- Serving Suggestion: For easier scooping, take the ice cream out of the freezer 5-10 minutes before serving. This allows it to soften just enough to achieve that perfect creamy consistency.
Conclusion
Creating your own gluten-free, no-churn
pralines and cream ice cream is a remarkably satisfying culinary adventure. From the rich, buttery homemade pecan pralines to the smooth, creamy vanilla base and the indulgent caramel swirls, every element comes together to form a dessert that's truly greater than the sum of its parts. This recipe proves that you don't need fancy equipment or complex techniques to enjoy a gourmet treat at home. It's easy, versatile, and delivers an explosion of sweet, salty, and utterly irresistible flavors. So, gather your ingredients, follow these simple steps, and prepare to delight your taste buds with a homemade classic that rivals, and arguably surpasses, any store-bought version. Enjoy the process, and savor every creamy, crunchy bite!